

What Actually Happens After You Say “Yes” to a Backyard Project? A DFW Construction Timeline
You’ve talked about the ideas, reviewed the estimate, and decided you’re ready to move forward with your backyard project.
So… what happens now?
For many homeowners, this is where the questions really begin.
When does construction start? Who handles the permit? When do materials arrive? Will there be inspections? When can we use the new patio?
Whether you’re building a patio cover, outdoor kitchen, fireplace, decorative concrete area, or a larger outdoor living space, understanding the process before construction begins can make the experience much easier.
While every project is different, here’s a look at a typical backyard remodel timeline in DFW and what homeowners can expect when working with Christian Carpentry.
Step 1: The Onsite Consultation
A successful backyard project starts at the property.
During an onsite consultation, we can see details that aren’t always obvious from photos or measurements alone.
We look at the existing home, roofline, backyard layout, access points, current concrete, drainage, utilities, and the area where you’re considering construction.
More importantly, this is when we talk about how you actually want to use the space.
Maybe you want shade over an existing patio. Maybe you’re planning an outdoor kitchen where everyone can gather. Or perhaps you’re thinking about a larger backyard transformation involving several features.
What the homeowner does:
This is your opportunity to share your priorities, ideas, inspiration photos, concerns, and approximate budget.
It also helps to tell us about future plans. If you’re building a patio cover now but hope to add a pool or outdoor kitchen later, knowing that from the beginning can influence the design.
What we do:
We evaluate the property, discuss what’s possible, take measurements as needed, and begin determining the best approach for your project.
Step 2: Design and Estimate
Once we understand the space and your goals, the project starts taking shape.
This stage is about turning ideas into a defined scope of work.
Depending on the project, decisions may include the size and location of the structure, materials, roofing, concrete, electrical features, stone, appliances, stain colors, and other finishes.
The goal is to make sure everyone understands what’s being built before construction starts.
What the homeowner does:
Review the estimate carefully and ask questions.
This is also the time to make selections and discuss changes. It’s much easier to adjust a design during planning than after materials have been ordered or construction has begun.
What we do:
We develop the project scope, prepare the estimate, discuss available options, and help you understand how the different parts of the project fit together.
Step 3: HOA Approval, If Required
If your neighborhood has a homeowners association, your project may need approval before work can begin.
HOA requirements vary considerably from one neighborhood to another. Some may request drawings, material information, dimensions, colors, or other project details.
This stage can affect the overall backyard remodel timeline, so it’s important not to leave it until the last minute.
What the homeowner does:
Homeowners are generally responsible for submitting the project to their HOA and communicating directly with the association.
If your HOA has specific forms or documentation requirements, let us know early.
What we do:
We can provide relevant project information needed for the submission so you have the details necessary to complete the HOA approval process.
The sooner approval is submitted, the less likely it is to delay the construction schedule.
Step 4: City Permits
HOA approval and city permits are two different things.
Even if your HOA approves the project, your city may still require a construction permit.
Permit requirements vary depending on the city and type of project. For applicable projects, Christian Carpentry handles the permitting process with the city.
In many cases, permit approval can take approximately three to four weeks, although actual timelines depend on the municipality and project.
This can sometimes feel like the quietest stage for the homeowner because there may not be visible activity in the backyard yet.
But work is still happening behind the scenes.
What the homeowner does:
Make sure any requested information is provided and HOA approval has been completed if applicable.
Then, in many cases, it’s simply a matter of waiting for the city to complete its review.
What we do:
We prepare and submit the necessary permit information, communicate with the appropriate city departments as needed, and wait for approval before beginning work that requires a permit.
Step 5: Scheduling and Site Preparation
Once the required approvals are in place, the project can move toward construction.
Before crews and materials arrive, we coordinate scheduling and prepare for the first phase of work.
Depending on the project, this might involve marking the construction area, preparing for concrete or foundation work, coordinating material deliveries, and confirming access to the property.
What the homeowner does:
Make sure crews can access the work area.
If materials will be delivered to the driveway, vehicles may need to be moved beforehand. Pets should also be kept safely away from active construction areas.
There may also be certain days when access to the inside of the home is needed, particularly for electrical work.
We’ll communicate those needs as the project progresses.
What we do:
We coordinate the construction schedule, crews, deliveries, and the sequence of work so each stage can happen in the proper order.
Step 6: Foundation, Piers, and Concrete Work
For many patio and outdoor living projects, some of the first visible construction involves the foundation or concrete.
Depending on the project, crews may need to dig structural piers, prepare forms, place reinforcement, and get everything ready for concrete.
This stage is particularly important because what happens below the finished surface supports what comes later.
And in DFW, where soil movement and drainage are important considerations, proper preparation matters.
Step 7: Inspections Happen Along the Way
One thing that can surprise homeowners is that an inspection doesn’t necessarily happen only when the project is finished.
Depending on the permitted work, inspections may occur at several stages.
For example, a project may require a foundation inspection before concrete is poured. Later stages may require framing or final inspections.
This means there may occasionally be a day when the project looks ready to move forward but work pauses while an inspection is completed.
That’s normal.
Inspections are checkpoints that allow required work to be reviewed before the next phase begins.
What the homeowner does:
Usually, very little. We may simply ask that the work area remain accessible when an inspection is scheduled.
What we do:
We coordinate required inspections and make sure construction progresses in the proper sequence.
Step 8: Concrete Is Poured and Given Time to Cure
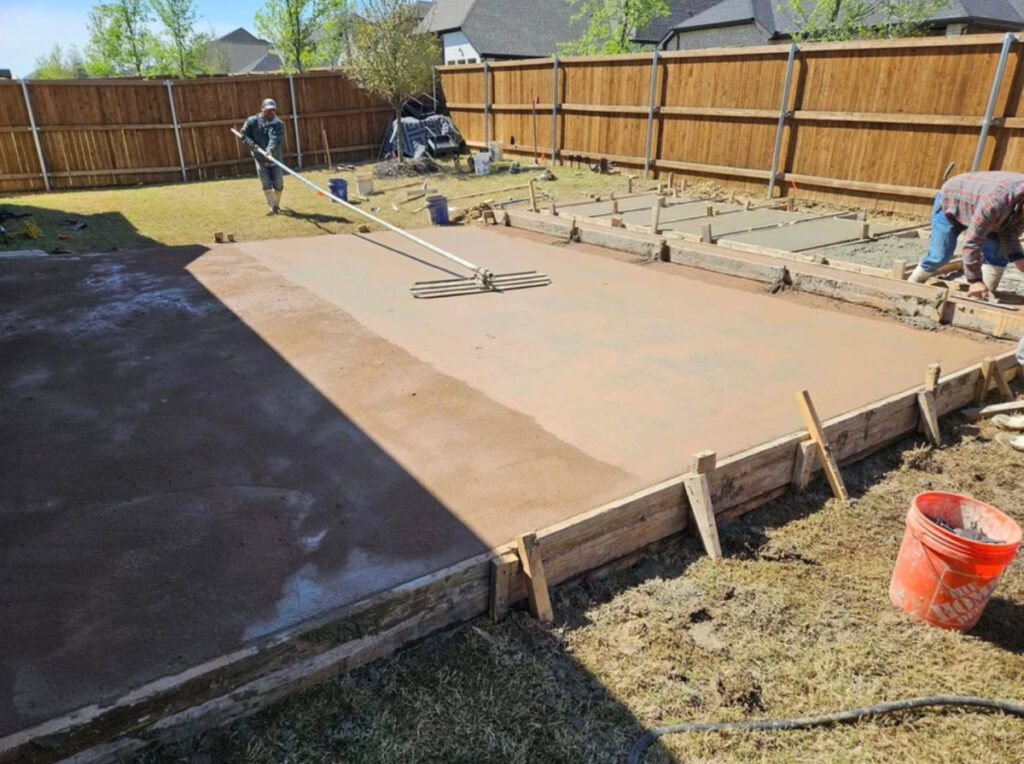
Once the necessary preparation and inspections are complete, concrete can be poured.
Seeing fresh concrete often feels like a major milestone because the size and layout of the new outdoor space suddenly become much easier to visualize.
But fresh concrete needs time.
Initial curing generally requires at least 24 to 48 hours, and certain portions of the project may need additional curing time before the next construction phase places significant weight or stress on the concrete.
Depending on the project, we may allow approximately one to two weeks for concrete and pier footings to cure appropriately before moving forward with certain structural work.
Trying to rush this part of the patio construction process isn’t worth it.
Step 9: Materials Arrive and Structural Construction Begins
Now the backyard starts changing quickly.
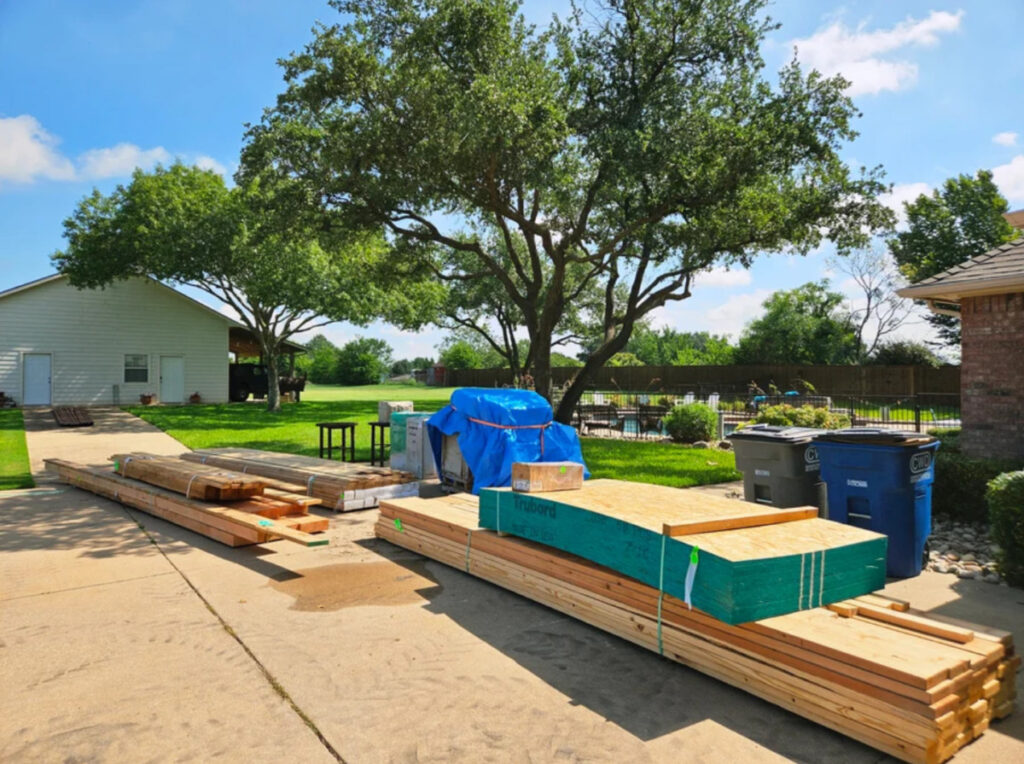
For a patio cover, lumber may be delivered and framing begins. Posts, beams, rafters, and roof components start turning the design into a recognizable structure.
Depending on the scope, this phase may also include roofing, ceiling installation, trim work, and other structural details.
A framing and roofing phase may take several days, but timing varies based on the size and complexity of the project, inspections, material availability, and weather.
What the homeowner does:
Keep the construction area accessible and pay attention to project updates.
This is also a good time to ask questions if you see something you don’t understand rather than waiting until the project is complete.
What we do:
Our team coordinates the trades and construction sequence while keeping the project moving from one phase to the next.
Step 10: Electrical, Outdoor Kitchens, Fireplaces, and Other Features
For larger outdoor living construction projects in Texas, several trades may be involved.
An outdoor kitchen, for example, may require masonry, appliance installation, electrical work, gas connections, plumbing, or countertop installation depending on the design.
A fireplace requires its own construction sequence.
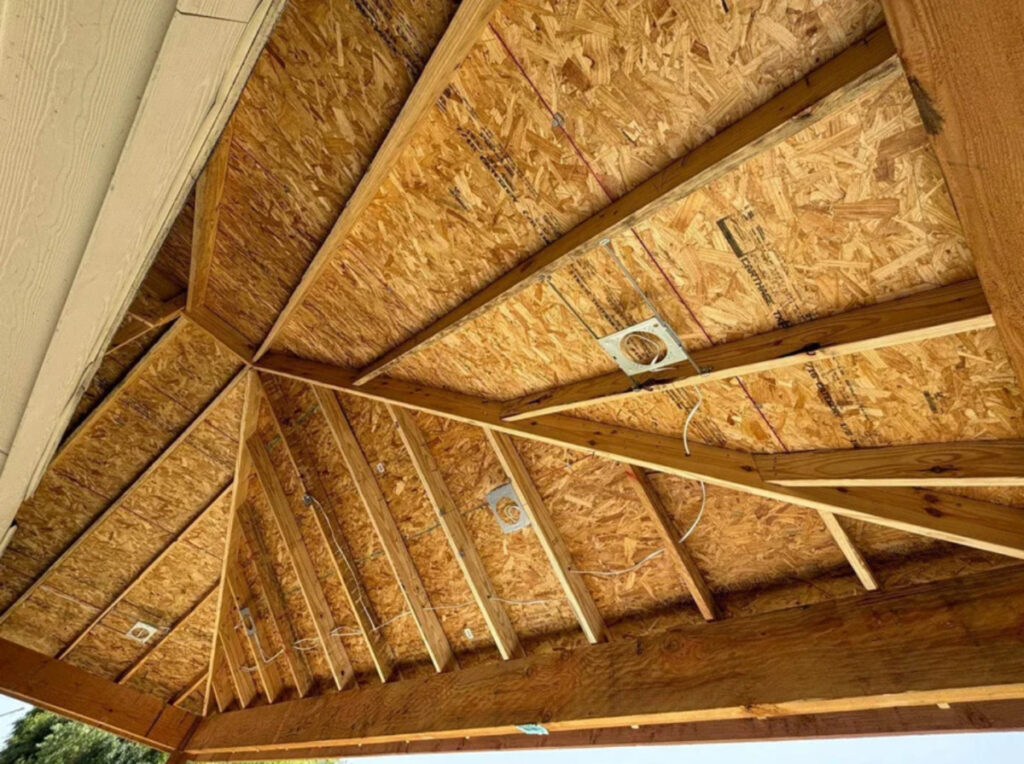
A patio cover may include electrical wiring for ceiling fans, lighting, outlets, or a television.
This is where planning the entire backyard as one project becomes especially valuable.
Instead of treating the patio cover, kitchen, fireplace, and electrical work as unrelated additions, each feature can be coordinated to work with the others.
Step 11: Finishing Details
Once the major construction is complete, attention shifts toward the details.
Depending on your project, this may include:
- Trim
- Stain
- Paint or finish work
- Gutters
- Lighting
- Ceiling fans
- Electrical fixtures
- Appliance installation
- Final masonry details
- Cleanup
These finishing touches are often what transform the space from a construction project into an extension of your home.
It’s also normal for finishing work to happen in stages as different trades complete their portions of the project.
Step 12: Final Inspection and Walkthrough
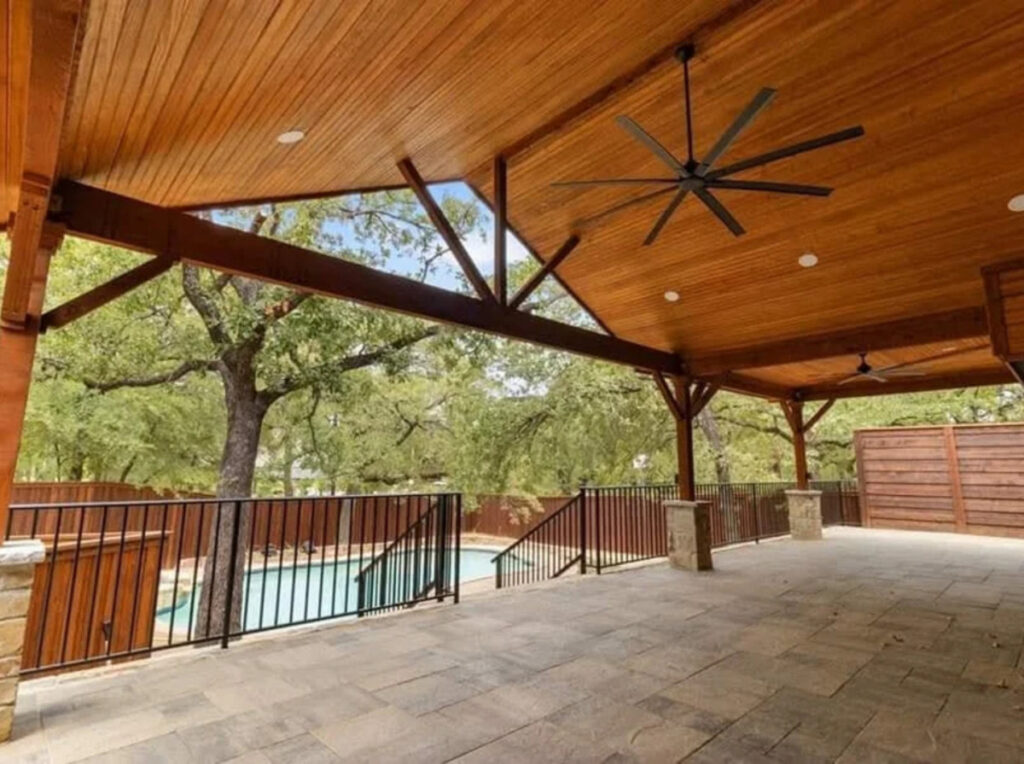
Before calling the project complete, applicable final inspections are completed and we conduct a final walkthrough.
The walkthrough gives us an opportunity to review the finished project together.
What the homeowner does:
Take a good look at the completed space and ask any remaining questions.
This is the time to understand any care or maintenance recommendations and make sure you’re comfortable with the finished project.
What we do:
We review the work, address applicable final items, complete the project process, and make sure you understand your new outdoor space.
And then comes the best part.
You get to use it.
How Long Does a Backyard Remodel Take in DFW?
This is one of the most common questions homeowners ask, and there isn’t one timeline that applies to every backyard.
A simple project and a complete outdoor living transformation involving a patio cover, concrete, kitchen, fireplace, and electrical work will naturally have very different schedules.
The overall timeline can also be affected by:
- HOA approval
- City permitting
- Required inspections
- Weather
- Material availability
- Project complexity
- Concrete curing
- Changes made during construction
That’s why it’s helpful to think about your project in phases rather than one single construction date.
Some stages happen quickly. Others require patience before the next phase can begin.
Why Does It Sometimes Look Like Nothing Is Happening?
Construction doesn’t always mean someone will be physically working in the backyard every day.
There may be times when the project is waiting for a city inspection, concrete to cure, materials to arrive, weather to clear, or the next scheduled trade.
Those pauses can be frustrating if you don’t know why they’re happening.
Communication is important throughout the process so homeowners understand not only what is happening, but also what needs to happen next.
Planning Makes the Construction Process Easier
The most successful backyard projects aren’t only about the finished design.
They’re also about everything that happens before the first post goes up.
A clear scope, HOA approval, permits, proper site preparation, inspections, curing time, trade coordination, and finishing work all play a role in creating an outdoor space that’s built to last.
At Christian Carpentry, we help DFW homeowners through the process from the initial onsite consultation through construction and the final walkthrough.
Whether you’re considering a patio cover, pergola, outdoor kitchen, fireplace, decorative concrete, pool, or a more complete backyard transformation, understanding the process before you begin can make the experience much less intimidating.
Thinking about starting a backyard project in DFW?
Schedule a free onsite consultation with Christian Carpentry. We’ll visit your property, learn what you want from your outdoor space, and help you understand what it will take to turn the idea into a finished backyard you can enjoy.